Creamy Pickle Mac & Cheese Recipe You’ll Crave Daily
The Tangy Twist on a Classic Comfort Food
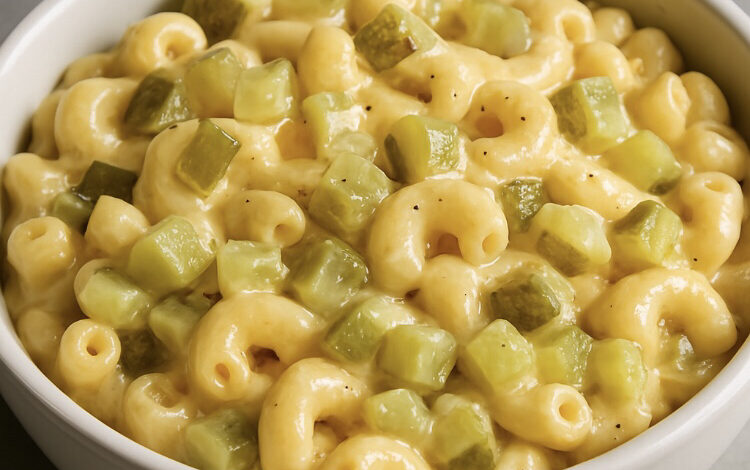
Mac and cheese is a cherished American staple — creamy, cheesy, and soul-warming. But if you’re ready to take this classic dish to the next level, let us introduce you to Pickle Mac & Cheese. Combining the rich, indulgent texture of traditional mac and cheese with the zesty punch of pickles, this recipe is a bold fusion of comfort and tang that will keep your guests coming back for seconds.
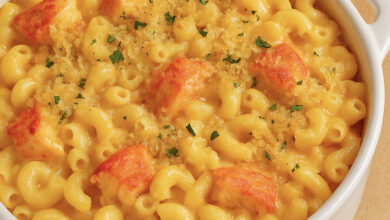
Inspired by the image above — showcasing creamy elbow macaroni swimming in a smooth cheddar sauce and topped with juicy chunks of dill pickles — this is not your average side dish. It’s the main event.
Why Pickles in Mac & Cheese?
Pickles might sound like an unconventional add-in for mac and cheese, but their bright acidity cuts beautifully through the richness of the cheese sauce. The result? A flavor-packed dish with contrast, balance, and unexpected boldness — everything you want in a comfort meal with character.
Ingredients (Serves 4–6)
all ingredients are easily available at your local grocery store.
For the Macaroni:
- 1 lb elbow macaroni
- 1 tbsp kosher salt (for boiling water)
For the Cheese Sauce:
- 4 tbsp unsalted butter
- 1/4 cup all-purpose flour
- 2 1/2 cups whole milk (room temperature)
- 1 cup heavy cream
- 2 1/2 cups sharp cheddar cheese, shredded
- 1 cup Monterey Jack or mozzarella cheese, shredded
- 1 tsp garlic powder
- 1/2 tsp onion powder
- 1/2 tsp black pepper
- 1/2 tsp smoked paprika (optional for depth)
- Salt to taste
Pickle Power:
- 3/4 cup chopped dill pickles (plus more for topping)
- 2 tbsp pickle brine (from the jar) — optional but recommended for flavor
Step-by-Step Recipe
1. Boil the Pasta
Bring a large pot of salted water to a boil. Cook the elbow macaroni according to package instructions until al dente. Drain and set aside.
2. Make the Roux
In a large saucepan, melt the butter over medium heat. Once fully melted, whisk in the flour to create a roux. Continue whisking for 1-2 minutes until the mixture is golden and slightly bubbly (this removes the raw flour taste).
3. Add the Milk and Cream
Gradually pour in the milk and cream while whisking constantly to prevent lumps. Bring the mixture to a low simmer. You’ll notice it thickening after 4–5 minutes.
4. Melt the Cheese
Lower the heat. Stir in the shredded cheddar and Monterey Jack cheese, a little at a time, until fully melted and smooth. Add garlic powder, onion powder, paprika (if using), black pepper, and salt to taste.
5. Pickle Time
Fold in the chopped dill pickles and a splash (1–2 tablespoons) of pickle brine. This is where the tangy magic happens — the brine boosts flavor without overpowering the dish.
6. Combine and Serve
Add the cooked pasta to the cheese sauce and stir to coat every noodle. Spoon into a serving bowl and top with a few extra pickle pieces for garnish and crunch.
Optional Toppings for Extra Crunch
Want to level it up? Try these pickle-themed toppings:
- Toasted panko breadcrumbs mixed with dried dill and melted butter.
- Crushed pickle-flavored potato chips.
- A drizzle of spicy pickle aioli for those who love heat.
Perfect Pairings
This Pickle Mac & Cheese is a side that can easily steal the spotlight. Pair it with:
- Fried chicken sandwiches
- BBQ ribs
- Grilled hot dogs
- Or serve it solo with a cold glass of dill pickle lemonade for the full experience
Storage & Reheating Tips
- Storage: Store leftovers in an airtight container in the fridge for up to 3 days.
- Reheating: Add a splash of milk before microwaving to restore creaminess.
Final Thoughts
Whether you’re a pickle fanatic or just looking for a way to reinvent classic mac and cheese, this recipe is a must-try. Creamy, tangy, and packed with flavor, Pickle Mac & Cheese delivers on both comfort and surprise.
Use it to elevate your next family dinner, summer cookout, or weekend indulgence — and don’t forget to save that pickle juice. You’ll want to make this again.